Blender and Unreal Engine: The Happy Couple
2026-08-18
Some software pairings feel like a compromise. This one doesn't.
Blender and Unreal Engine are good at almost exactly opposite things, which is precisely why they work so well together. Blender is where you make the thing. Unreal is where the thing becomes real — lit, walkable, interactive, rendered in milliseconds instead of hours.
And the entire pipeline, end to end, costs nothing to start.
💑 Why They Fit So Well
Neither tries to be the other, and that's the point.
| Blender | Unreal Engine | |
|---|---|---|
| Job | Authoring | Presentation and interaction |
| Best at | Modeling, sculpting, UVs, rigging, animation | Real-time lighting, worlds, gameplay, cinematics |
| Render time | Minutes to hours (Cycles) | Milliseconds |
| Output | Assets and finished frames | Playable, walkable, filmable experiences |
| Cost to start | Free, forever | Free until you're making real money |
Blender has one of the best modeling toolsets in existence and no serious real-time engine. Unreal has a world-class real-time renderer and modeling tools nobody would choose over Blender's. Together, there is very little in 3D you cannot do.
💡 Think of it as workshop and stage. You don't build furniture on the stage, and you don't perform in the workshop.
🚀 What UE5 Changed
Two Unreal 5 features moved this from "workable" to genuinely exciting, because both remove chores that used to eat entire days:
Nanite handles enormous amounts of geometry without you hand-building levels of detail. Historically you'd sculpt something beautiful in Blender, then spend hours retopologising and baking it down so an engine could cope. For static meshes, Nanite largely removes that step — bring in the dense mesh.
Lumen does dynamic global illumination in real time. No baking light, no waiting, no re-baking every time you move a lamp. You drag a light and the entire scene responds instantly.
If you learned that game art means "optimise everything by hand, then wait for bakes," this is the part worth paying attention to. Some of that work simply isn't required any more.
🎯 What This Pairing Unlocks
- Games — the obvious one, from solo projects to studio work
- Architectural visualisation — instead of a still render, hand the client a walkthrough
- Virtual production — the LED-wall workflow behind a lot of modern film and TV
- Animated shorts — render a frame in milliseconds instead of minutes, and iterate the way you actually want to
- Product visualisation — configurators where the viewer changes colours and parts live
- Motion graphics — real-time output with quality that used to demand offline rendering
That's an unusually wide range for two free downloads.
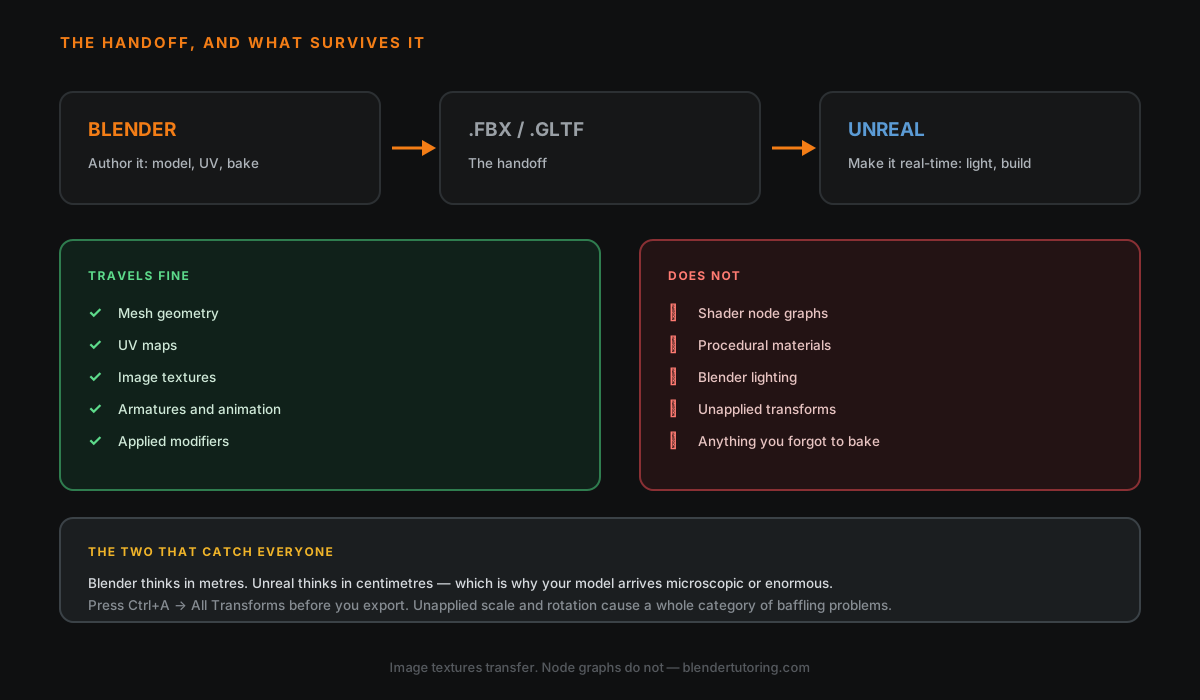
🔁 How the Handoff Works
The practical loop is simple:
- Model, UV, and rig in Blender
- Export (FBX is the traditional path; glTF is a strong modern option)
- Import into Unreal
- Build materials and light the scene in Unreal
- Iterate — change the mesh in Blender, re-export, Unreal picks it up
Epic also maintains a free set of Blender add-ons, including a "Send to Unreal" tool that pushes assets across without the manual export dance. Worth installing early, since it removes most of the friction people complain about.
💣 The Gotchas Nobody Warns You About
Units do not match. Blender thinks in metres, Unreal thinks in centimetres. This is the single most common reason a model arrives either microscopic or the size of a building. Decide how you're handling scale before you build a whole scene around it.
Apply your transforms. In Blender, press Ctrl+A → All Transforms before exporting. Unapplied scale and rotation cause a whole category of baffling problems on the other side — the same habit that saves you during UV unwrapping.
Your materials will not survive the trip. This surprises everyone. Blender's shader nodes and Unreal's material graph are different systems, so a beautiful procedural Blender material does not arrive intact. Image textures transfer. Node graphs do not.
So bake procedurals to textures first. If your material is generated from noise and gradients rather than image files, bake it down in Blender before exporting, or plan to rebuild it in Unreal's material editor.
Name things properly from day one. Studios use prefixes like SM_ for static meshes and T_ for textures. It feels fussy with five assets and saves your sanity at five hundred.
💡 Exact export settings shift between versions of both programs. Verify the values against your own versions rather than trusting any tutorial's screenshot — including this one's advice.
💸 What It Actually Costs
Blender is free and always will be — it's open source, funded by donations and corporate sponsors.
Unreal is free to download and use, with royalties owed only on games past a substantial revenue threshold, and separate terms for commercial non-game work. Epic changes these terms periodically, so check the current licensing before you build a business on an assumption.
For a learner, an indie, or a freelancer starting out: zero.
🧭 Should You Learn Both?
Learn Blender first. Every skill in it — modeling, topology, UVs, rigging — transfers to any engine you ever touch, and you can't hand Unreal good assets before you can make good assets.
But knowing that Unreal is waiting changes how you learn Blender. You start caring about clean topology and sensible UVs, not because a tutorial told you to, but because you can see where they're going. That's a much better reason.
Read next: UV Unwrapping in Blender, Without the Panic — the skill that matters most once your models start leaving Blender.
Want to build toward a real-time portfolio piece rather than another tutorial file? Book a free intro call →
Newsletter
Get more tips like this
Short, practical Blender guides for beginners — straight to your inbox. No spam. Unsubscribe any time.