How to Make Glass in Blender
2026-11-11
Glass looks like it should be hard — it bends light, it reflects, it's see-through, and getting all three to behave feels like a dark art. It isn't. In Blender, believable glass is about four slider values on the standard material and one thing in your scene that most beginners forget. Once you know those, you can make clear glass, coloured glass, frosted glass, even a cut gem, all from the same handful of settings. Here's the whole recipe.
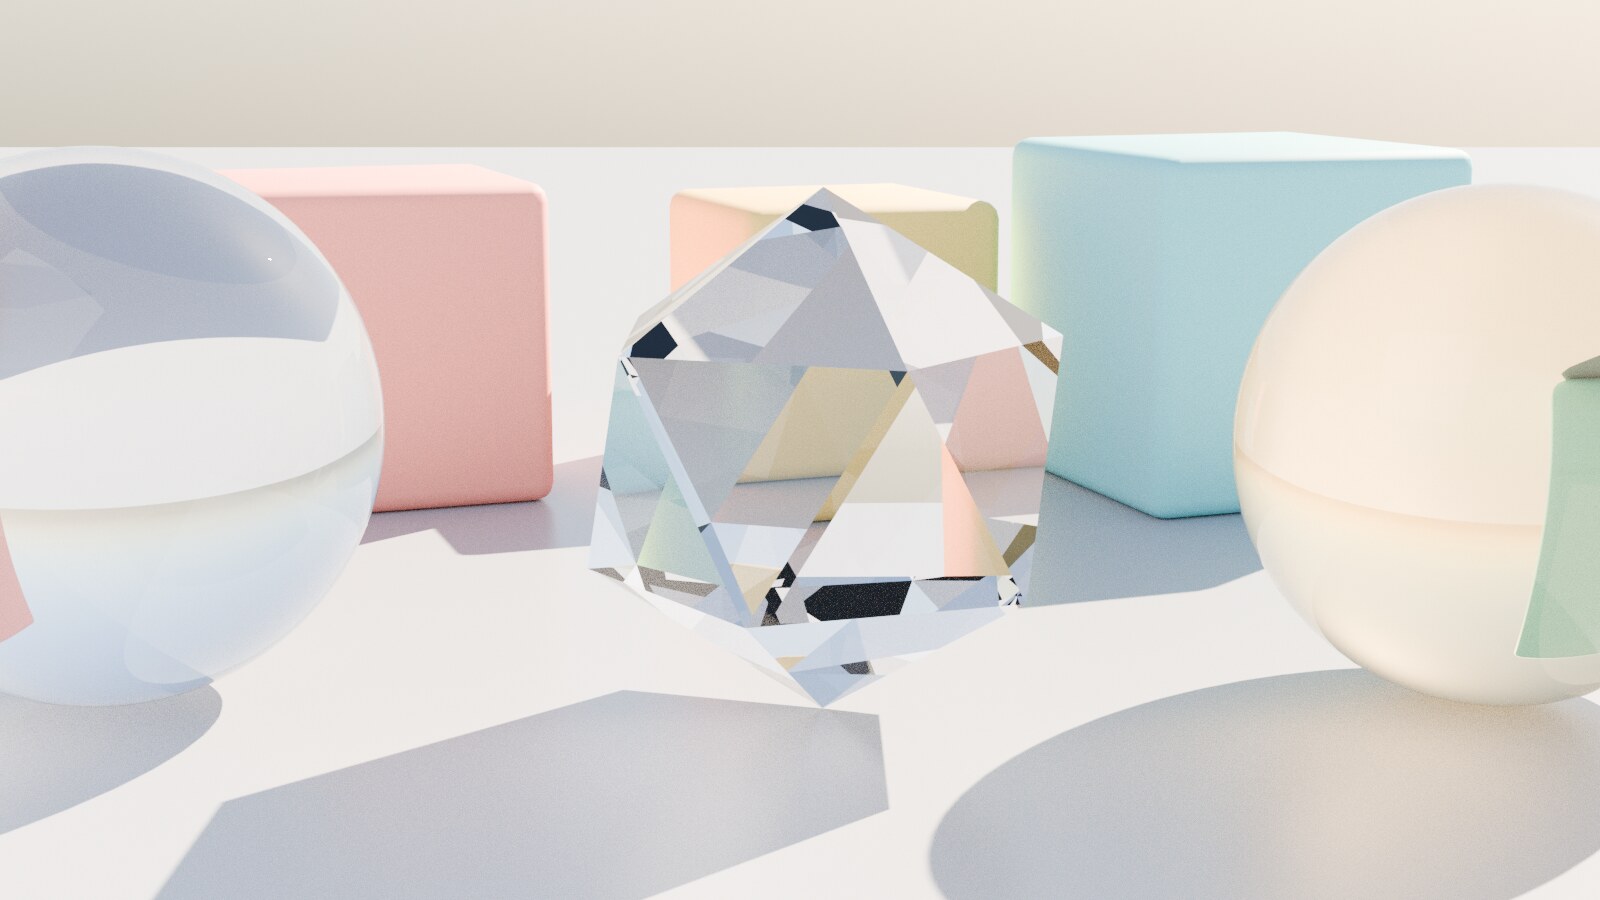
Those spheres and the gem are one material with a couple of numbers changed — and the reason they look like glass is sitting behind them, which we'll get to.
🔍 Glass Is Transmission + Reflection
Real glass does two things to light: most of it passes through and bends (refraction), and some of it bounces off the surface (reflection). The Principled BSDF already does both — you just have to turn them on correctly. Four values:
- Transmission → 1.0. This is the one that makes the surface see-through. Everything else is detail.
- Roughness → 0.0. Glass is smooth, so reflections and refractions stay sharp. Nudge it up later for frosted glass.
- IOR → 1.45. Index of Refraction — how much the light bends. Real glass is about 1.45–1.5; water is 1.33, diamond is 2.4. This number is the difference between "glass" and "slightly odd water."
- Base Color. White for clear glass; a colour for tinted. Keep tints pale — real coloured glass is subtle, not neon.
That's the entire material. If it looks wrong, it's almost never these four values — it's the scene.
🪞 The Thing Everyone Forgets
Here's the part that separates convincing glass from grey blobs: glass has nothing to show unless there's something to refract and reflect.
A glass sphere in an empty scene renders as a dull grey ball, because there's nothing for the light to bend toward or bounce off. The magic of glass — the warped, upside-down view through it, the bright highlights on its edges — comes entirely from its surroundings. So:
- Light it with an environment. A Sky Texture or an HDRI in the world gives glass a world to reflect and refract. This is the single biggest upgrade to any glass render.
- Put something behind it. Colourful objects behind the glass are what you see through it, flipped and bent. In the render above, the whole appeal is the orange, red and teal shapes being refracted — remove them and the glass goes lifeless.
If your glass looks flat and grey, it is nine times out of ten this, not the material. It's the same lesson as water: these materials are mostly a window onto their environment.
🧊 Variations From the Same Four Sliders
Change one value and you get a whole different material:
- Frosted / etched glass: raise Roughness to around 0.2–0.4. The surface scatters light instead of transmitting it cleanly, giving that soft, milky look.
- Coloured glass: set a pale Base Color. For deeper, more realistic tint that darkens with thickness, drive the colour through a Volume Absorption shader instead of base colour — thick parts read richer, thin edges lighter, exactly like real bottle glass.
- A gem or crystal: raise the IOR (1.5–2.4) and use a faceted, flat-shaded mesh. The high IOR and hard facets create the sparkle and internal bounces that read as a cut stone.
One material, four knobs, a dozen looks.
⚙️ Two Settings That Fix "Wrong" Glass
Glass leans on light bouncing through the object many times, and Cycles caps how many bounces it traces. Two things to check when glass looks dark, black, or hollow:
- Light Paths → Transmission bounces. The default can be too low for thick or stacked glass, turning the inside black. Raise it (12–24) and the interior clears up.
- Shadows. Enable the material's option to render proper refractive shadows (and consider Cycles' caustics settings) so glass casts believable light patterns instead of a flat dark blob.
And one gotcha for real-time: this clean, refractive glass is a Cycles look. In EEVEE, transmission needs the Raytracing/Screen Space Refraction options switched on, and it will never be quite as accurate — worth knowing before you wonder why your EEVEE glass looks off.
⚠️ The Common Mistakes
- Nothing to refract. Grey, dead glass. Add a sky and put objects behind it. (The big one.)
- Roughness too high by accident. Milky when you wanted clear — keep it at 0 for crystal-clear.
- Wrong IOR. Left at a random value; real glass is ~1.45. It's a small number with a big effect.
- Neon tints. Coloured glass with a fully saturated base colour looks like plastic. Keep tints pale, or use absorption.
- Forgetting it renders noisy. Transmission and caustics are grainy by nature, so glass scenes need the noise fixes, not just more samples.
🎯 One Window, Many Materials
The trick with glass — like water, like lava before it — is realising it isn't a complicated material. It's four honest sliders on top of the thing that actually does the work: the scene around it. Transmission to let light through, low roughness to keep it crisp, the right IOR to bend it believably, and a world worth looking at through the glass.
Give it something beautiful to refract, and the material almost makes itself.
Read next: How to Make Water in Blender — the same transmit-and-reflect idea, applied to oceans and still water, with the Ocean modifier for the waves.
Want to build glass (or water, or a gem) live and actually understand why each slider does what it does? Book a free intro call → and share your screen. Materials and lighting click fast with someone walking you through the logic once.
Newsletter
Get more tips like this
Short, practical Blender guides for beginners — straight to your inbox. No spam. Unsubscribe any time.