Ucupaint: Layer-Based Texture Painting in Blender
2026-11-14
Blender can model, sculpt, render and animate — but the moment you try to texture paint something, you hit a wall. The built-in tool is one image and a brush. No layers, no masks, no non-destructive adjustments. Make a mistake halfway through and you are painting over your own work with no way back. For years the answer was "export to Substance Painter." Not any more. Ucupaint is a free, open-source add-on that bolts a proper layer-based painting system onto Blender — think Photoshop or Substance layers, living right inside your material. Here's what it is, why it's a big deal, and how to start using it.
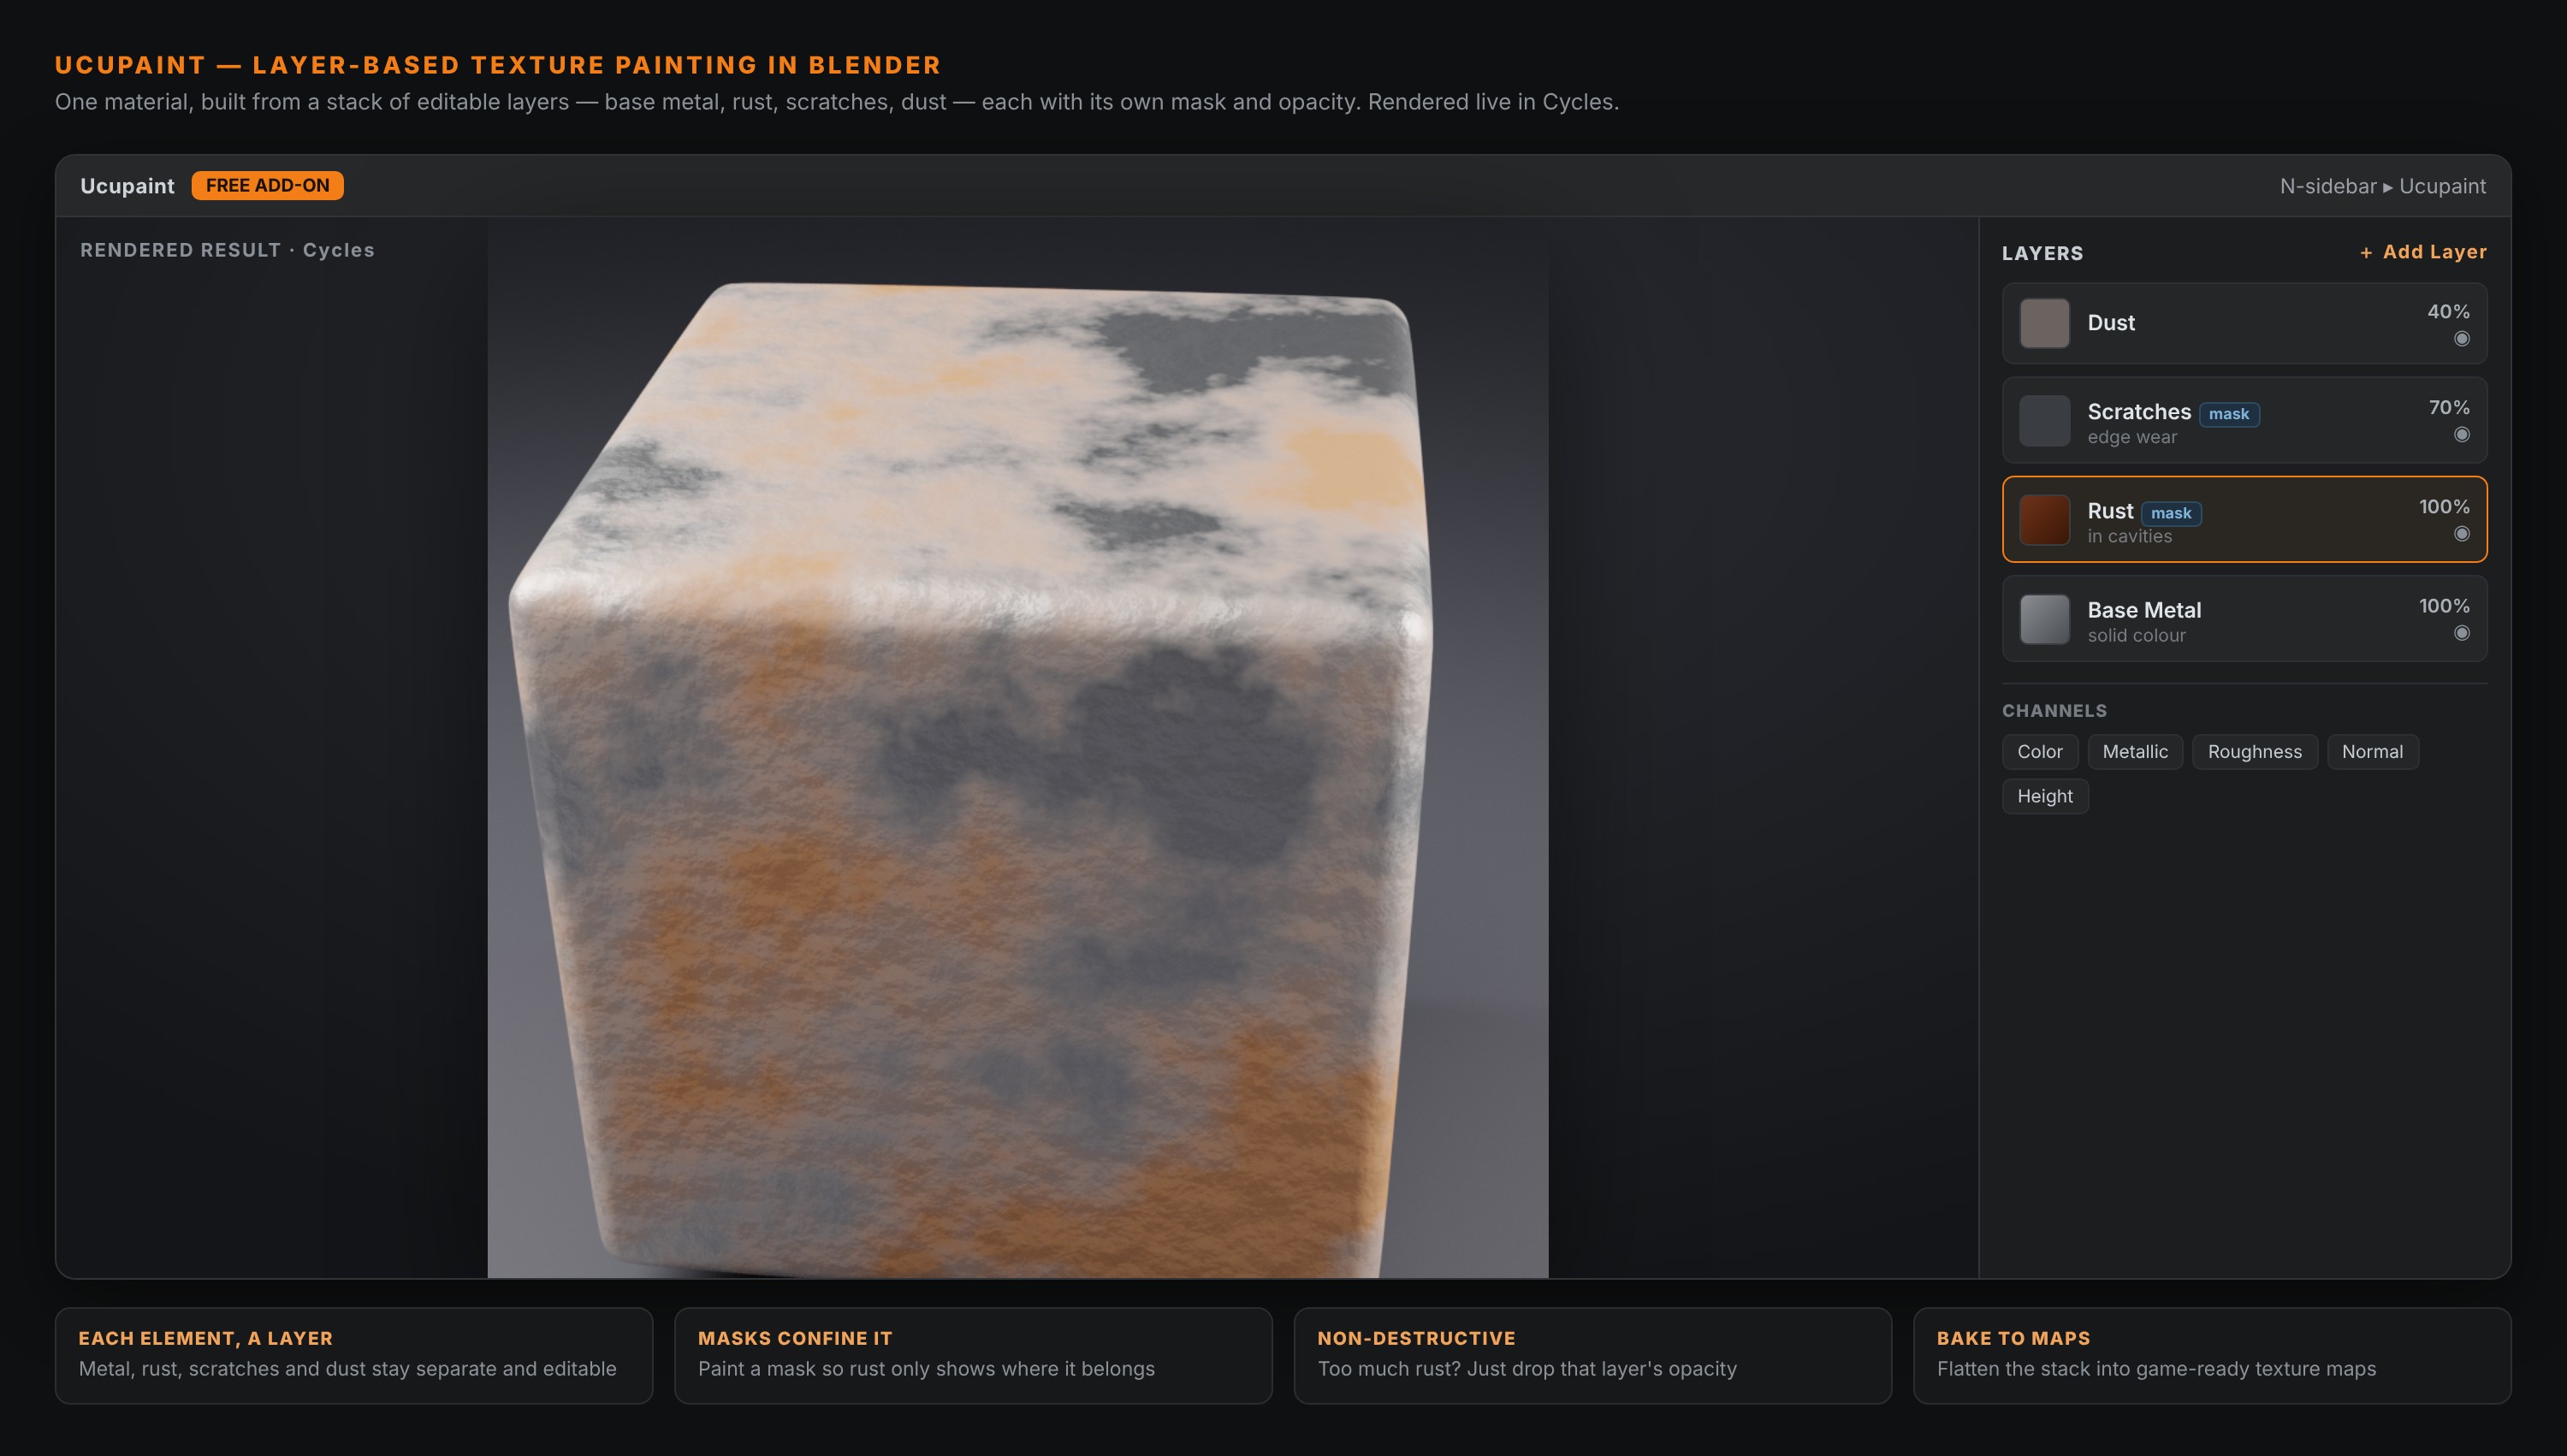
That rusty metal is one material — but it's built from a stack of layers, each one editable on its own, exactly like a 2D image editor. That stack is the whole point of Ucupaint.
🎨 What Ucupaint Actually Is
Ucupaint is a layer manager for texture painting. Instead of painting onto a single flat image, you build your texture out of stacked layers — a base colour, a dirt pass, scratches, a logo — each one independent, reorderable, and editable at any time. It works in both Eevee and Cycles, it's completely free and open source, and it installs like any other Blender add-on.
If you've used Substance Painter, Photoshop or Procreate, you already understand it: layers from top to bottom, each with its own opacity, blend mode and mask. Ucupaint brings that mental model to Blender's own paint mode, and wires the result straight into your shader so what you paint is what renders. People describe it, fairly, as "turning Blender into Substance Painter" — for free.
🧱 Why Layers Change Everything
Here's the problem with plain Blender texture paint: every stroke is baked into one image. Paint rust over your metal, then decide the rust is too heavy, and you're stuck — there's no rust layer to turn down, only pixels you'd have to paint back out by hand.
With Ucupaint, each part of the look is its own layer:
- Base metal sits on the bottom.
- Rust goes on a layer above it, confined by a mask so it only shows in the crevices.
- Scratches sit above that, Dust above that.
Want less rust? Drop that layer's opacity. Move the scratches somewhere else? Repaint just the scratch mask. Nothing you do to one layer touches the others. This is non-destructive texturing, and it's the single biggest reason to use the add-on — it turns texturing from a nerve-wracking one-shot into something you can actually iterate on.
Stuck on your own model's textures? Bring your .blend to a free 15-minute screen-share and we'll set up a clean UV-to-texture workflow live — no pitch, no commitment. Book a free call →
✨ What It Can Do
Ucupaint is more than a layer list. Out of the box it handles:
- Layers from anything — painted images, image textures, procedural textures, even vertex colours, all stacked together.
- Masks on every layer — paint a mask, use a texture as a mask, or drive it from geometry (edges, cavities) so wear lands where it naturally would.
- Adjustment layers — non-destructive colour, value and normal tweaks that affect the layers below, like adjustment layers in Photoshop.
- Every channel, not just colour — paint bump, tangent-space normal, displacement and vector displacement too, so your surface gets real depth, not just colour.
- Baking built in — bake your whole layer stack down to flat image maps for export, and pack channels together (for example into an ORM map, or a DirectX-style normal) for game engines.
That last point matters if you're making game art: Ucupaint can take you from a blockout all the way to engine-ready texture maps without ever leaving Blender.
🆕 Ucupaint 3.0
The add-on is actively developed, and the latest major release, Ucupaint 3.0, is a big step up. It adds adjustment layers, dedicated displacement channels, unified previews so you can see a single channel in isolation while you work, and more flexible texture baking. Earlier 2.x releases had already made baking and layer-pasting much stronger. In short: it's not a toy project — it's a maturing tool with a real roadmap.
🛠️ How to Install It
Two ways, depending on your Blender version:
- Blender 4.2 or newer (easiest): go to Edit ▸ Preferences ▸ Get Extensions, search Ucupaint, and click Install. It's on Blender's official extensions platform, so it's one click and it stays updated.
- Any version: download the add-on zip from its GitHub page, then Edit ▸ Preferences ▸ Add-ons ▸ Install, pick the zip, and enable it.
Once it's on, the panel lives in the 3D Viewport sidebar (press N) under a Ucupaint tab — and also in the Shader Editor sidebar, so you can manage layers from wherever you're working.
🚀 Your First Ucupaint Texture
The workflow, start to finish:
- Unwrap your model first. Ucupaint paints into UV space, so clean UVs are a prerequisite — if your UVs are a mess, your texture will be too. (New to this? Start with UV unwrapping without the panic.)
- Open the Ucupaint panel in the N-sidebar and click to set it up on your object's material — it builds the node network for you.
- Add a base layer — a solid colour or an image — as your foundation.
- Add a new layer for the next element (say, rust). Give it a mask, switch to paint mode, and paint the mask where you want it to show. Adjust its colour and roughness on the layer itself.
- Keep stacking — scratches, dust, a logo — each on its own layer, each adjustable forever.
- Bake when you're done to flat maps for export, or just render straight from the layers in Eevee or Cycles.
That's the loop: unwrap, stack layers, paint masks, bake. It feels immediately familiar if you've touched any layer-based editor.
⚖️ Ucupaint vs Substance Painter
The honest comparison: Substance Painter is still more powerful — smart materials, a huge content library, and clever mask generators that read your mesh automatically. If texturing is your full-time job, it earns its subscription.
But Substance costs money and means exporting your model out and your maps back in every time something changes. Ucupaint is free, lives inside Blender, and updates the render live as you paint — no round-trip. For hobbyists, students, and plenty of indie and freelance artists, it's not a compromise; it's simply enough. And "free, already where your model is" beats "more powerful but over there" more often than you'd expect.
⚠️ Things to Know First
- Good UVs are non-negotiable. Ucupaint paints into your UV layout. Unwrap properly first, or nothing downstream will look right.
- Some features are in a paid "Plus" tier. The core add-on is free; a few extras (like PSD import/export) are reserved for sponsors.
- Baking has limits. It currently can't bake several objects with different materials down to one shared texture set — plan your materials accordingly.
- The docs are catching up. The project moves fast and parts of the official wiki lag behind the latest version, so expect to experiment a little.
- Big textures are heavy. Many high-resolution layers will use a lot of memory and can slow the viewport — texture at a sane resolution for your target.
🎯 The Takeaway
Texture painting has long been Blender's weakest link, the one place artists still reached for other software. Ucupaint closes most of that gap — a free, layer-based, non-destructive painting system that lives inside Blender and renders live in Eevee and Cycles. Unwrap your model, stack your layers, paint your masks, and you can take a surface from bare mesh to engine-ready maps without a single export. If you texture in Blender at all, it's one of the highest-value add-ons you can install.
Read next: How to Bake a Normal Map in Blender — Ucupaint can paint and bake normals; here's the baking fundamentals that make the results behave.
Texturing is where a lot of beginners stall out. Book a free intro call → and share your screen — we'll set up a clean UV-to-texture workflow on your own model, Ucupaint included.
Newsletter
Get more tips like this
Short, practical Blender guides for beginners — straight to your inbox. No spam. Unsubscribe any time.